Task 1 - Background images
Create a full width banner image, with a text overlay - as demonstrated with the image on the right:
If you would like to download this large blue image to experiment with, you can do so by right clicking the image below and selecting ‘Save image as’ to save it to your local device.


Specifications:
Use the background image URL functionality to add this image (firstly you will need to make sure that you upload the image to the image library).
Configure the image in the row/column edit interface so that the whole image (or its primary aesthetic) is present when viewing the page.
Add title text to the image, by adding and configuring a featured or rich text tile to meet your specifications.
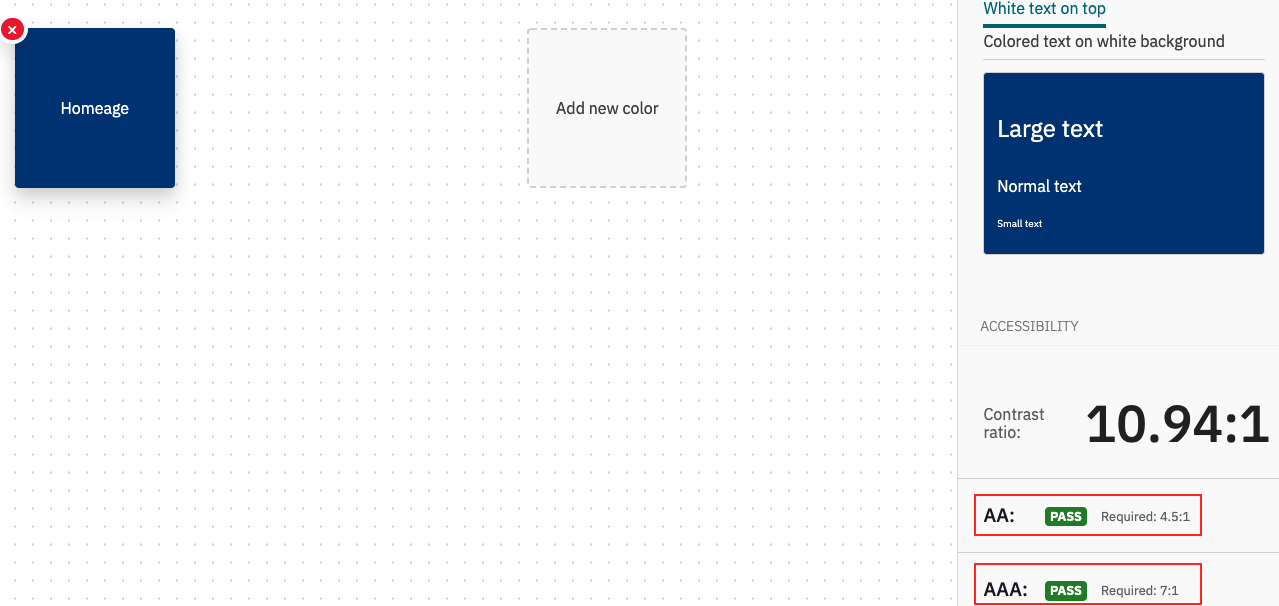
Change the font colour in the column edit interface to stand out clearly against the background image.
Add/remove spacing top/bottom to determine where you would like the text to sit against the background image.
Make sure the text passes accessibility standards, by running the accessibility tool (featured on the right) we have built called Chromasome here.
Task 2 - Column spacing
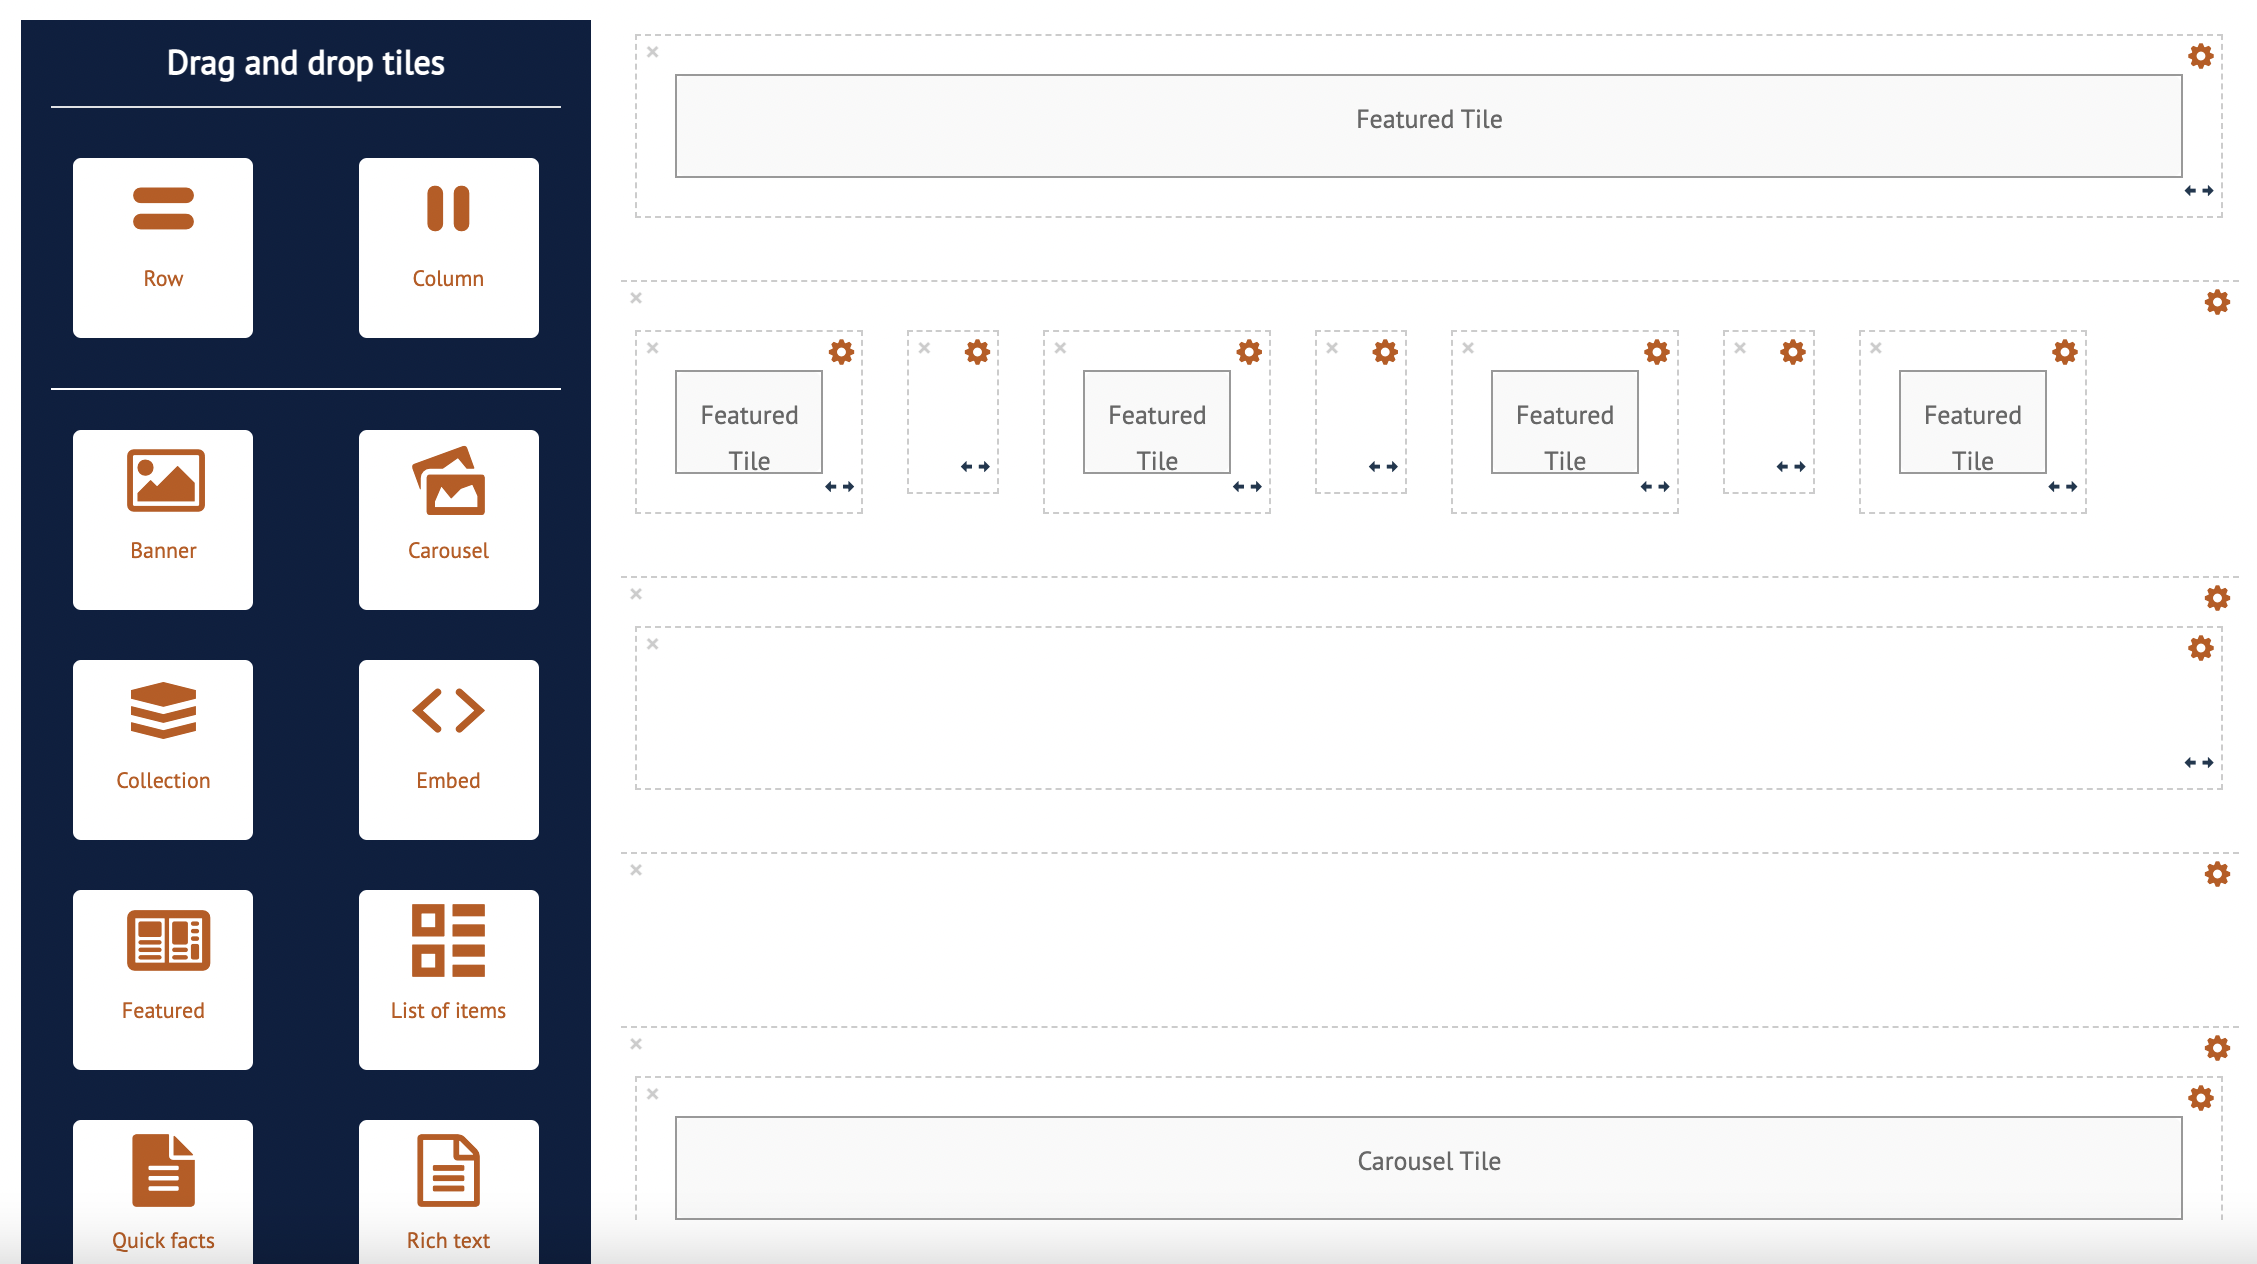
Create a multi-column row, using blank columns to add space between content.
Specifications:
Create multiple featured tile columns, adding in different coloured backgrounds via the column edit interface, and overlay accessible text on each.
Use the row edit interface to make all columns in the row of equal height.
Add in blank columns between these content tiles to create equal space between them.
Use padding to create coloured square(ish) shapes in each column.
Add a coloured background to the row, which occupies the space in between the content columns.
Task 3 - Breaking up a page
Create two rows which act as a full width break of content, using background colour and padding on each to achieve this.
Specifications:
Use padding to generate the desired height of these content breaks.
Use margins to give space above and below the content breaks.
Use the opacity feature to increase the transparency of these rows.
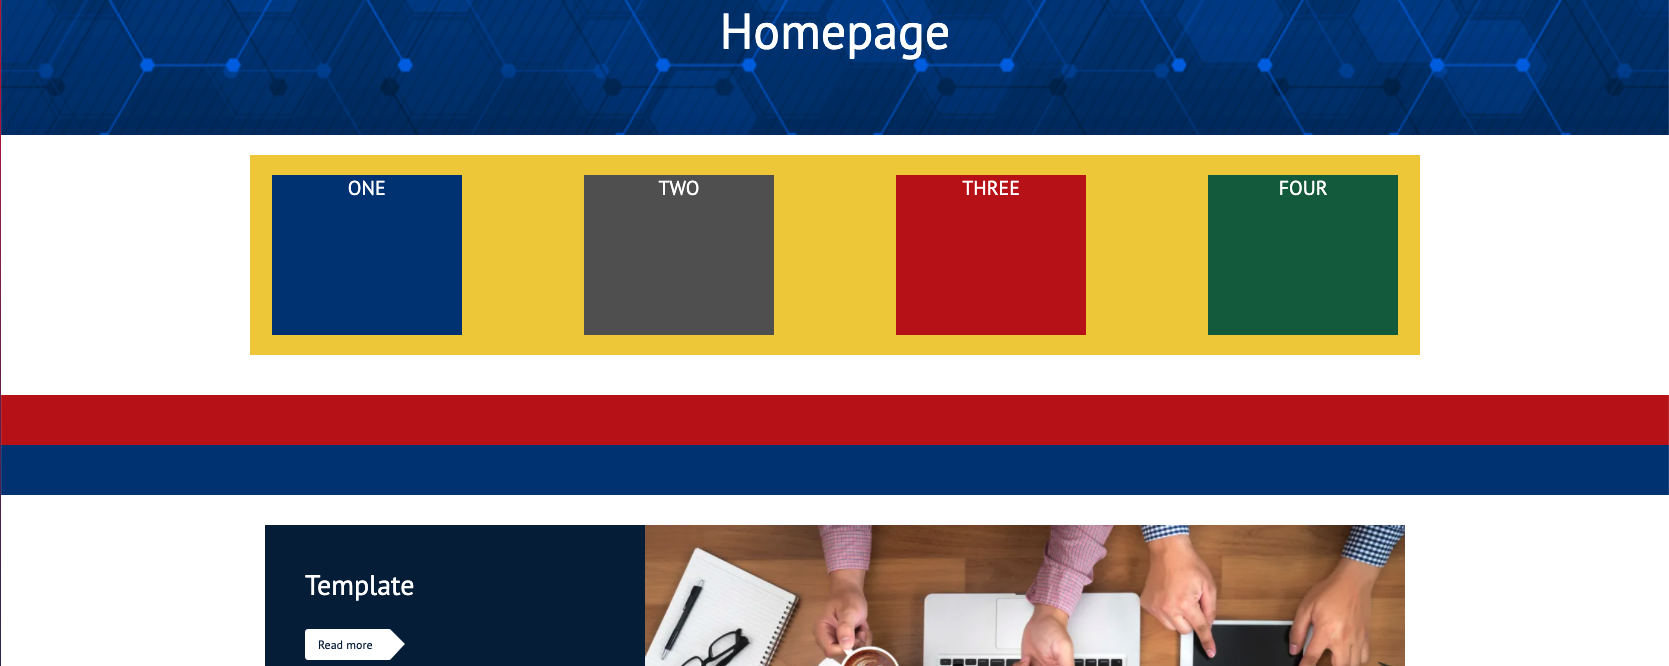
The layout for the page as shown on the right (above) is as shown on the right (below):